Upcycled Wine Bottle Border Edging for Balcony Planters
Give your balcony planter boxes a colorful, eco-friendly edge by repurposing wine bottles. This DIY border is easy to install, adds a unique decorative touch, and fits perfectly in small urban spaces.
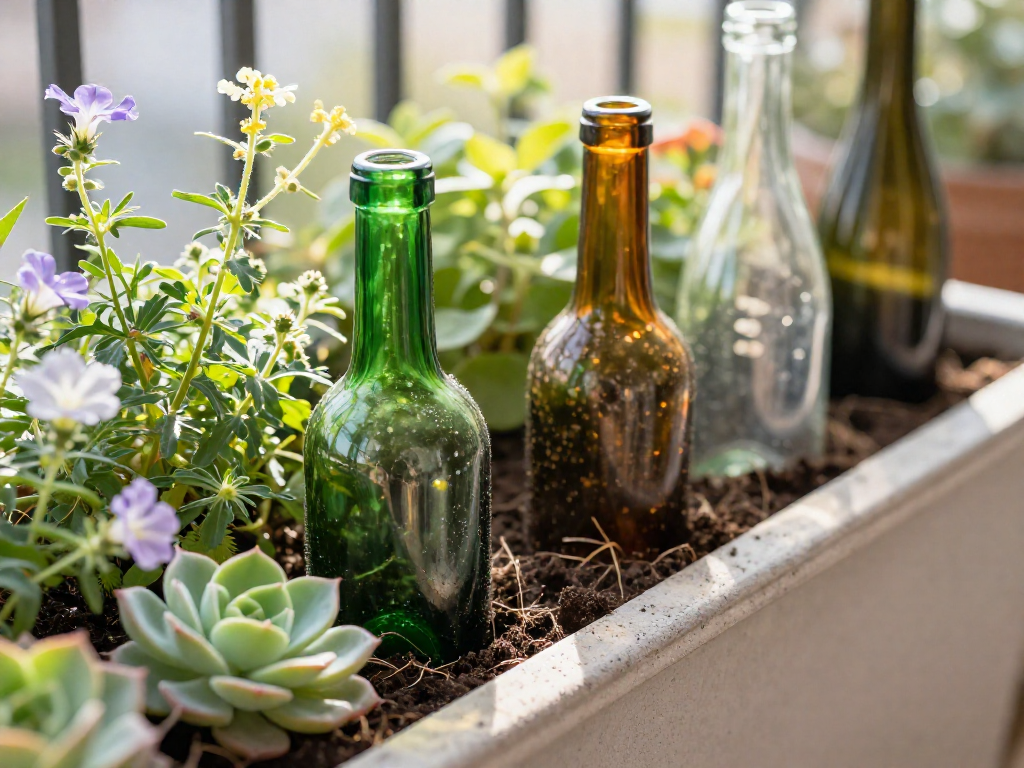
Why Upcycle Wine Bottles as Planter Edging?
Your balcony planter boxes don’t have to settle for plain edges—especially when a creative, budget-friendly upgrade is already hiding in your recycling bin. Wine bottles make stunning planter borders that blend practicality with personal style. They’re made of thick, durable glass that stands up to sun, rain, and wind without cracking or fading, so you won’t need to replace them season after season.
The real magic is visual. Amber, olive green, cobalt blue, and clear bottles catch the light and add a jewel-like glow to your plantings. You can choose a single color for a sleek, unified look or mix hues for playful contrast. The bottles’ curves and heights create a natural rhythm along the container’s rim, turning an ordinary planter into a tiny, curated garden feature.
Beyond looks, this is a feel-good choice for the planet. Reusing bottles keeps them out of landfills and sidesteps the energy-intensive recycling process. It’s a small act that reflects your values, right on your balcony. Best of all, it’s an easy, low-cost project. You only need a handful of clean bottles, some soil or gravel for anchoring, and a few minutes to nestle them in place. No special tools, no expert skills—just a satisfying way to bring texture, color, and a hint of cocktail-hour charm to your container garden.
Selecting and Prepping Your Bottles
When it comes to upcycling bottles for your balcony planter edging, the selection process is just as important as the prep work. Start by choosing bottles made from thick glass—wine and champagne bottles are ideal because they're sturdy enough to withstand the elements and occasional bumps. You’ll often find them in beautiful shades of blue, green, or clear, which can complement any plant palette without needing paint or extra decoration. Look for bottles that have a uniform shape and a nice heft; avoid thin-walled glass like soda or beer bottles, as they’re more likely to crack during installation.
Once you’ve gathered your bottles, the first step is removing labels and any sticky residue. Fill a basin or your sink with warm soapy water and let the bottles soak for about 30 minutes. This loosens the adhesive and makes peeling off paper labels much easier. For stubborn glue, a plastic scraper or a scrubby sponge can work wonders without scratching the glass. If you run into really persistent residue, a dab of baking soda mixed with cooking oil makes a gentle, effective paste. Rinse well and dry the bottles completely before moving on.
Safety is paramount when working with glass, so before you start handling cut edges, put on a pair of sturdy work gloves and protective eyewear. Even if the bottles aren’t broken, tiny shards can still pose a risk. Look at the edges of each bottle—if you plan to use them upside down with the neck buried, the bottom rim might be smooth enough as is. But if you’re using the cut end or any jagged surfaces, you’ll want to smooth them out. Fine-grit sandpaper (around 220-grit) works well for light smoothing; just wrap it around the edge and rub in a circular motion until it feels safe to the touch. For more control or larger rough spots, a rotary tool like a Dremel with a grinding stone attachment makes quick work of sharp edges. Always keep a steady hand and work outdoors or in a well-ventilated area.
Taking the time to select the right bottles and prep them properly ensures your edging project is both safe and long-lasting, giving you a polished look that's ready to frame your balcony plants with a touch of recycled charm.
How to Install Wine Bottle Edging in a Balcony Planter
Adding a wine bottle border to your balcony planter is a simple weekend project that instantly transforms an ordinary container into a conversation piece. Start by gathering your prepped bottles, a tape measure, a small trowel, and some extra potting mix or fine gravel. Choose a planter that's deep enough for your plants' roots—at least 8 inches is ideal—so you have room to work.
Measure the perimeter and plan your spacing. Use a fabric tape measure to find the exact distance around the planter's inner or outer edge, depending on where you want the border to sit. A typical wine bottle is about 3 inches in diameter, so spacing them 2–4 inches apart gives a balanced look. Multiply the number of bottles by the bottle width plus your chosen gap, then check that it fits your measurement. For example, a 30-inch perimeter planter could hold 8–10 bottles spaced 3 inches apart. Lay the bottles out on a flat surface first to test the arrangement and make sure you have enough.
Create a shallow trench or push bottles directly into the soil. If your planter is already filled with soil, water it lightly to soften the surface. You can either dig a narrow trench about 2 inches deep along the edge, or simply push each bottle straight down into the soil. The trench method works well if you want them to sit at a uniform height; just use a trowel to carve a groove. For a more whimsical look, vary the depth slightly. On an empty planter, you can position the bottles first and then add soil around them.
Decide on bottle orientation for different styles. Upside-down bottles (bottom up) create a clean, uniform line of green or brown glass with the punt facing the sky. Neck-down bottles show off the elegant curves and catch the light differently. Try alternating or grouping by color for a mosaic effect. If you're using bottles with the necks down, you may want to push them deeper into the soil so they're stable—about a third of the bottle buried. For upside-down bottles, the wide base gives more natural stability.
Secure the bottles and backfill. Once each bottle is in place, gently firm the soil around it with your fingers. If the soil is loose, mix in some fine gravel or sand to improve drainage and hold the bottles straighter. Step back and check that the row is level—adjust any leaning bottles. Finally, water the entire planter lightly to settle the soil, but avoid drenching the bottles until plants are established. This edging stays put even on a windy balcony because the bottles are heavy and partially buried, but you can always add a little extra gravel at the base if needed. With everything in place, you're ready to plant your favorite herbs or flowers right up to the border for a polished, reclaimed look.
Creative Design Ideas for Your Bottle Border
Once your bottles are securely in place, it’s time to let your personality shine through the design. This border does more than define the planter edge—it becomes a tiny gallery for your creativity. Try alternating bottle colors to create a checkerboard or rainbow effect along the rim. For an even more playful look, intersperse smaller bottles like beer or soda bottles to vary the heights and break up the rhythm. If you’re growing a long, shared planter, use the bottle border to visually separate herbs from flowers, giving each side its own distinct character while keeping the roots comfortably mingling. And don’t stop at bottles: pair the glass edging with other upcycled accents such as tin can planters hung on the railing or a small pallet wood frame behind the planter. These layered touches turn your balcony into a cohesive, eco-chic retreat that feels entirely your own.
Maintenance and Care for Bottle Edging
Keeping your upcycled bottle border looking its best is simple with occasional care. A quick wipe-down with a damp cloth every few weeks removes dust, pollen, and city grime that can dull the glass. If you notice stubborn spots, a mild soap solution works wonders—just rinse well afterward.
After a heavy rainstorm or gusty wind, do a quick inspection. Bottles can shift slightly, especially in lightweight potting mix. Gently nudge any misaligned bottles back into place. This takes only a minute and prevents gaps from forming.
Accidents happen, and if a bottle breaks, safety comes first. Carefully pick up any large pieces, then use a damp paper towel to collect tiny shards—never use your bare hands. Dispose of the glass in a sturdy container. Replace the broken bottle with a spare you’ve already prepped, and your border is as good as new.
If you live in a region with freezing winters, consider removing the bottle edging before the first frost. Water trapped inside can freeze and expand, potentially cracking the glass. Simply lift out the bottles, let them dry, and store them in a covered area until spring. This extra step extends the life of your border and keeps it looking pristine year after year.
FAQ
Can I use any type of glass bottle for planter edging?
Most glass bottles work, but choose ones with thick, sturdy walls like wine or champagne bottles. Avoid thin, fragile glass that might crack easily. For consistency, pick bottles of similar size and color.
Is it safe to have glass bottles on a balcony? What if one breaks?
It’s safe if bottles are securely placed neck-down in soil. If one breaks, carefully collect large pieces with gloves, then pat the area with duct tape to pick up tiny shards. Always supervise children and pets.
How do I clean the bottles when they get dirty from rain and soil?
Remove them gently and soak in warm soapy water, using a bottle brush to scrub. Rinse thoroughly and let dry completely before reinstalling. Avoid harsh chemicals that could harm the plants.
Will the sun fade the color of the glass bottles over time?
Colored glass is generally UV-resistant, but prolonged intense sun may cause slight fading over many years. To slow it, you can rotate bottles occasionally or apply a UV-protective clear spray.
Can I use plastic bottles instead of glass for a similar effect?
Yes, thick plastic bottles like liter soda bottles can work. They’re lighter and safer, but may look less elegant and can warp in heat. Paint them for a better appearance.