How to Build a Space-Saving Hanging Shelf from Reclaimed Wood
Struggling to fit all your plants and outdoor essentials on a tiny balcony? Discover how a DIY hanging shelf crafted from reclaimed wood can add vertical storage, rustic charm, and a personal touch—all without eating up precious floor space.
Why a Hanging Shelf? The Balcony Space-Saving Solution
If your balcony feels more like a storage closet than a garden escape, you’re not alone. In small urban spaces, every square inch counts, and floor-standing furniture can quickly swallow up precious room for seating or that oversized monstera you’ve been dreaming of. A hanging shelf changes the game by lifting your plants off the ground and into often-wasted vertical space. Suddenly, your ceiling becomes an asset—giving you room to breathe, walk, and actually enjoy your balcony.
Unlike bulky shelving units that crowd your view, a suspended shelf creates an airy, open feel. It draws the eye upward, making your space look taller and more intentional. You get to show off trailing pothos, colorful succulents, and cascading ferns at different heights, which not only looks stunning but also ensures each plant gets the light it needs. Plus, the custom, reclaimed-wood look adds warmth and personality that store-bought pieces rarely match.
For renters, this approach is a particularly clever solution. With the right hanging hardware, you can secure a shelf without drilling into walls or railing—think tension rods, removable hooks, or even suspension from sturdy overhead pipes. When it’s time to move, the shelf comes down cleanly, leaving no trace. It’s a budget-friendly, high-impact upgrade that turns your balcony into a layered, lush sanctuary you’ll actually use.
Sourcing and Prepping Reclaimed Wood for Outdoor Use
Finding wood with character doesn’t have to break the bank. Your best bets are old pallets (look for the 'HT' stamp meaning heat-treated, not chemically treated), barn wood from salvage yards, or discarded solid-wood furniture like old headboards or table leaves. Steer clear of anything that’s rotted, spongy, or reeks of chemicals—pressure-treated lumber and wood with unknown glues or stains aren’t safe for plants or food areas. A quick sniff test and looking for a grayish-green tint can tip you off.
Before you start building, give each board a thorough once-over. Pry out any remaining nails or staples with a hammer and nail punch. Run your hand gently over the surface to catch hidden splinters or cracks that might weaken the shelf. If the wood seems structurally sound but has minor checks or wormholes, it can actually add charm—just make sure they don’t go all the way through.
Now, clean it up without erasing the history. Use 80-grit sandpaper to knock off the worst roughness, then switch to 120-grit to smooth edges without making it look brand new. Preserve the patina: only sand areas that will touch skin or snag on things, leaving the character-rich face lightly touched. For deep grime, wash with a mix of mild soap (like castile) and warm water, using a stiff brush. If you spot dark mildew spots, scrub with a solution of one part white vinegar to three parts water and let it dry completely in the sun—UV helps kill spores.
Protecting your shelf for life outdoors is all about sealing. Natural oils like tung oil or linseed oil soak in, leaving a matte, natural look that ages gracefully. They’re easy to reapply but need annual touch-ups on a balcony exposed to rain and sun. Marine varnish creates a tougher, glossy film that blocks moisture and UV but can peel over time and is trickier to strip and redo. For most balconies, an oil finish wins for simplicity and warmth; if your space gets direct, harsh weather, a spar varnish might be worth the extra effort. Whichever you choose, apply at least two coats, fully drying between, and pay special attention to end grains where water sneaks in.
Now your reclaimed wood is ready to become a space-saving hanging shelf that tells a story.
Step-by-Step: Building Your Hanging Shelf
Ready to bring your reclaimed wood to life? This project keeps tools simple—a hand saw or jigsaw, drill, sandpaper, measuring tape, and a few basic supplies. You’ll also need rope or lightweight chain, two ceiling hooks or wall brackets rated for your planned weight, wood screws, and eye screws or small U-bolts. Gather everything before you start so you can enjoy the process without interruptions.
First, measure your balcony spot carefully. Decide how deep and long your shelf should be—a depth of 6 to 8 inches works well for small pots and décor, while length depends on your available vertical space. Hold a piece of cardboard or a scrap board up to visualize, and mark the hanging points on the ceiling or wall above. Remember to account for the drop length of the ropes or chains.
Cut your reclaimed plank to length with a hand saw or jigsaw, following the measurements you took. If the wood is wide enough for your desired depth, one plank is all you need. For a wider shelf, consider placing two narrower planks side by side, joined with a couple of small battens underneath screwed into both. This saves material and adds visual interest. Sand all edges and faces until smooth to the touch—nobody wants splinters while reaching for their favorite fern.
Pre-drill holes wherever screws will go to prevent splitting old wood. For a single-plank shelf, drill two holes near each end for the hanging hardware, spacing them evenly from the edges. If you’re building a double-plank shelf, first attach the battens across the undersides, then pre-drill the hanging holes through both planks for a clean look.
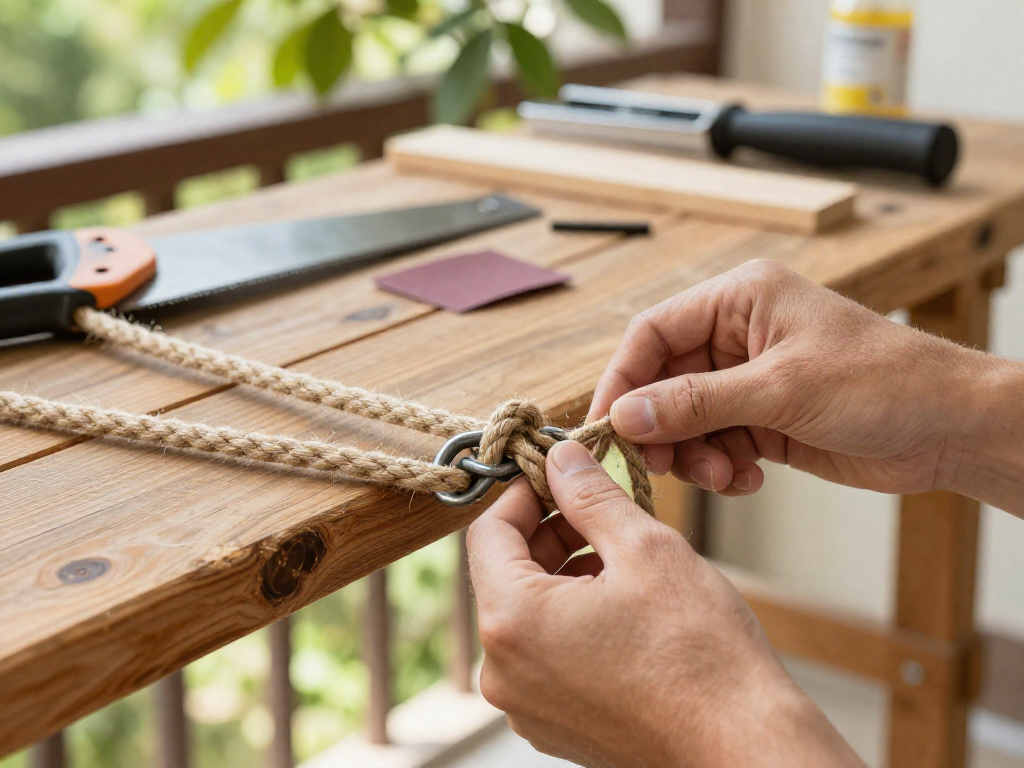
Now attach the hardware that will hold your ropes or chains. Twist eye screws firmly into the pre-drilled holes, or if using U-bolts, thread them through and secure with nuts. Make sure they are tight and aligned. Tie the ropes or connect the chains at equal lengths, checking with a level as you go.
For a small but practical finishing touch, you can add a thin front lip—just a narrow strip of reclaimed wood screwed or glued along the front edge. This keeps pots and tools from sliding off in a breeze. Give the whole shelf a gentle test before loading it with your favorite plants, and enjoy the extra floor space you’ve created.
Hanging It Securely: Balcony-Friendly Mounting Options
Mounting your hanging shelf securely on a balcony requires the right approach for your specific structure. Whether you're dealing with concrete walls, wood siding, or a metal railing, there’s a landlord-friendly method that keeps your shelf rock-steady and your deposit intact. Here are three reliable ways to hang your reclaimed wood creation.
Over-the-Railing Bracket Hangers
If drilling isn’t an option, over-the-railing brackets are your best bet. These adjustable hooks clamp onto the top rail and provide a sturdy arm from which to suspend your shelf. Look for models with padded grips to prevent scratches, and always measure your rail width before buying. They work beautifully on metal or wooden railings and can be repositioned easily.
Ceiling Hooks into Solid Material
When your balcony has a solid overhead—like a wood beam or a concrete ceiling—ceiling hooks offer a clean, strong mount. For wood, pre-drill holes slightly smaller than your screw-in hook to avoid splitting. For concrete, use a masonry drill bit and insert a plastic anchor or expanding sleeve before threading in the hook. This method keeps the floor and railing free, giving you maximum planting space.
Tension Rods Between Walls
If no overhead or railing is available, heavy-duty tension rods can span between two parallel walls. Choose a rod rated for well over your shelf’s total weight, and wrap the ends with non-slip rubber to protect surfaces. Tension systems are completely reversible, making them ideal for renters. Just ensure the walls are sturdy enough to handle the horizontal force.
Guessing Weight Limits and Distributing Load
Before hanging, estimate your shelf’s total weight—wood, soil, pots, and plants—and double-check the limit of each mounting point. Spread the load evenly by placing heavier items near supports, and use multiple suspension points if you’re using rope or chain. This reduces stress on any single fastener and keeps your shelf level.
Securing Against Wind
A sudden gust can turn a hanging shelf into a hazard. Add lightweight guy lines from the shelf corners to stable fixtures like railing posts or wall hooks. Alternatively, attach small weighted stops—think decorative pebbles in mesh bags—to the shelf’s underside to dampen movement. Both methods stay discreet and keep your balcony garden safe.
With the right mounting, your reclaimed wood shelf will be a safe, stylish addition to your balcony garden—anchored against everyday bumps and breezes, yet easy to remove when your lease is up.
Styling Your Shelf with Plants and Decor
Now that your hanging shelf is securely in place, the real fun begins—turning it into a lush, personality-packed focal point. Think of it as a vertical stage where you can play with heights, textures, and little moments of charm. By layering your plant choices, mixing in thrifted treasures, and keeping a few practical tips in mind, you’ll create a display that feels effortlessly curated and full of life.
Start with the plants. The top shelf is prime real estate for trailing varieties like string of pearls, pothos, or ivy—their cascading vines soften the shelf’s edges and draw the eye upward. On the middle shelf, place upright growers like snake plants, small ferns, or a compact peace lily; they provide structure and act as a visual anchor. Reserve the lowest shelf for petite succulents, air plants, or low-growing herbs. This tiered approach not only looks balanced but also ensures every plant gets the right amount of light, with the most sun-hungry ones on top and shade-tolerant friends below.
But a great shelf isn’t just about plants—it’s a mini gallery. Scout thrift stores or flea markets for vintage finds that add soul: a tiny brass lantern, a hand-thrown ceramic pot with a weathered glaze, or a miniature framed print propped against a stack of old books. These pieces break up the greenery and invite guests to linger. Stick to a color palette that complements the warm wood tones of your reclaimed shelf. Terracotta pots bring an earthy Mediterranean feel, sage green ceramics echo the leaves themselves, and crisp white vessels add a modern, airy touch. If you’re feeling bold, mix in a few pops of dusty blue or mustard for a playful contrast.
Don’t be afraid to refresh your display with the seasons. In winter, battery-operated fairy lights woven through the vines or tucked into glass jars create a cozy, magical glow. Come summer, swap in bright, moisture-loving plants like ferns and hang a colorful outdoor cushion on a nearby chair to tie the whole balcony together. Little changes like these keep your space feeling alive and responsive to your mood.
Finally, keep your plants happy and healthy with a simple rotation routine. Every week or two, shift pots so each side gets equal sun exposure, and consider the watering needs of different levels—trailing plants on the top shelf might dry out faster from wind, while lower succulents need less frequent drinks. Place a small watering can or mister within easy reach, and you’ll find the ritual of caring for your green oasis as restorative as the view itself.
FAQ
Can I hang a shelf on a balcony without drilling into walls?
Yes, you can use tension rods, over-the-rail hooks, or heavy-duty adhesive hooks designed for outdoor use. Just ensure the method you choose is compatible with your balcony's surfaces and can support the weight of the shelf and items.
What type of reclaimed wood is best for outdoor use?
Weather-resistant woods like cedar, redwood, or teak are ideal for outdoor projects because they naturally repel moisture and insects. If reclaimed, make sure the wood hasn't been treated with harmful chemicals, and avoid softwoods like pine unless thoroughly sealed.
How much weight can a hanging shelf hold?
The weight capacity depends on the hanging system, hardware, and wall anchors. A well-secured shelf using proper hooks and strong rope or chain can typically hold 20–50 pounds, but always check the limits of each component.
Do I need to seal or treat the wood for a balcony?
Yes, outdoor wood should be sealed with a waterproof sealant or exterior-grade polyurethane to protect against rain, sun, and humidity. This extends the wood's life and prevents warping or rotting.
How do I prevent the shelf from swinging in the wind?
You can stabilize the shelf by attaching small rubber bumpers to the back corners to create friction against the wall. Alternatively, use a lightweight, sturdy design and position plants or heavier items toward the bottom to lower the center of gravity.